Ah, the ubiquitous Glock. Although countless keyboard commandos love to talk smack on these boxy little beasts, the Austrian-born pistol is one of the most popular handguns in the world. One of the best things about Glocks is their simplicity. That carries over to cleaning, too.
Once you get the hang of it, cleaning a Glock is crazy simple. And even better, you clean all Glocks essentially the same way. We’re going to detail exactly how to do that in this post with some help from my trusty Glock 19.
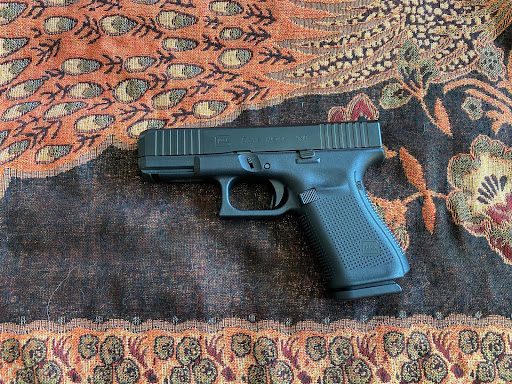
The author’s Glock 19 atop a stylish tactical headscarf.
Glock Cleaning Guide
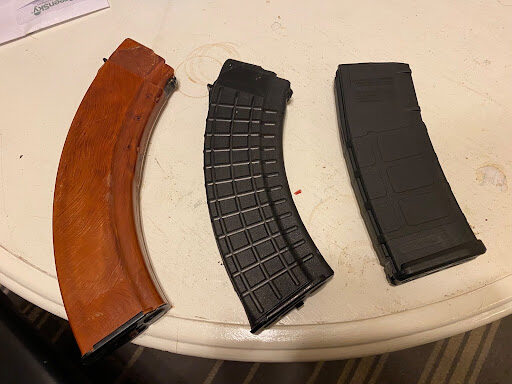
Glocks are one of my absolute favorite handguns. They’re sort of the “AK of the pistol world.” They’re super reliable and always go bang, even when they’re filthy.
With that being said, you do have to clean your Glock sometimes (unfortunately).
When Should I Clean My Glock?
Some people are religious about cleaning their guns. I get that way with certain firearms – like my M1A, for example.
My Glock is not one of those guns. I try to clean mine after 400-500 rounds or so. You absolutely can let your Glock go much longer than that – up to 1,000 rounds, even – before cleaning it.
Note: if your Glock is your daily concealed carry gun, DO NOT DO THIS. Always keep your concealed carry gun in pristine condition. You don’t want to rely on a dirty gun when your life is on the line.
Step-By-Step Glock Cleaning Guide
Step Zero
Whenever cleaning any firearm should be ensuring that it’s not loaded. It may seem like a no-brainer. But you always want to check to make sure your gun isn’t loaded whenever you clean it. I do this by removing the magazine and racking the slide twice.
The other thing you’re going to want to do before you start breaking down your Glock is getting your tools together. Fortunately, Glock makes this easy by shipping its guns with a bore brush. But you’ll also need a cleaning rod, some cotton patches, a cleaning jag, double-ended nylon brushes, and some gun cleaner. I like Ballistol since it’s food safe – that’s right, you can eat it.
Step One: Remove Slide
The first thing you’re going to need to do when disassembling your Glock is remove the slide. This can give some newer Glock owners a bit of trouble at first. The easiest way I’ve found to do this is by using one hand to pull the slide slightly back (see picture below).
Next, lower the slide lock (the notched plastic piece just forward of the trigger) with your other hand. Finally, push your slide forward to remove it from the frame.

How to remove your Glock’s slide.
Step Two: Disassemble
Removing the slide is definitely the hardest part of taking a Glock apart. Once you have it off, it’s smooth sailing. Next, remove the recoil spring assembly from the slide. That’ll remove the barrel. Take that out as well. Now, you’ve fully disassembled the gun. Good job!
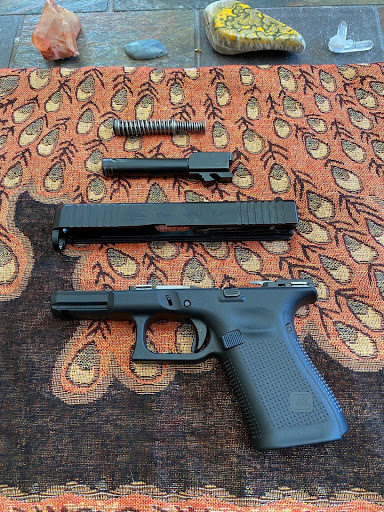
Field stripped Glock 19.
Step Three: Spray
Now that you’ve taken your Glock apart, you’re ready to get to the cleaning part.
The first thing I do is spray everything down with Ballistol. Make sure to spray the grooves on the slide, inside the barrel, the recoil spring, and the notches on the frame that connect to the slide grooves. Then, give it a few minutes to let the Ballistol do its thing. Go grab a White Claw or something (I recommend Mango).
Step Four: Scrub
After you get back, it’s time to start scrubbing. I usually begin by wiping down the recoil spring assembly. Then, I get to work on the barrel. Give it a few thorough scrubs with your bore brush. Then, run some patches through. Repeat the process until the patches come out clean.
Next, it’s time to get to work on the slide. Scrub down the slide grooves, along with anywhere that you can see carbon buildup. Finally, get to work cleaning the frame. You’re going to want to ensure all the metal parts are squeaky clean.
Once you’re done scrubbing, wipe everything down with a rag to remove any extra Ballistol.
Step Five: Reassemble
Congrats, you’re done cleaning! The only thing left is to put all the pieces back together.
The barrel goes into the slide first. Then, slightly compress the recoil spring and replace it. It’ll hold the barrel in place. Reattach the slide by aligning the slide grooves to the metal tabs on the frame and pushing it backwards. Keep pushing the slide back along the frame ‘till it clicks.
Finally, rack the slide and pull the trigger to make sure everything still works the way it should. Once you do, you’re all done and ready to put another thousand rounds through one of the most reliable pistols in the world.
Are there any other firearms you would like cleaning guides for? Let us know on social media!
RELATED STORIES